 Pin This
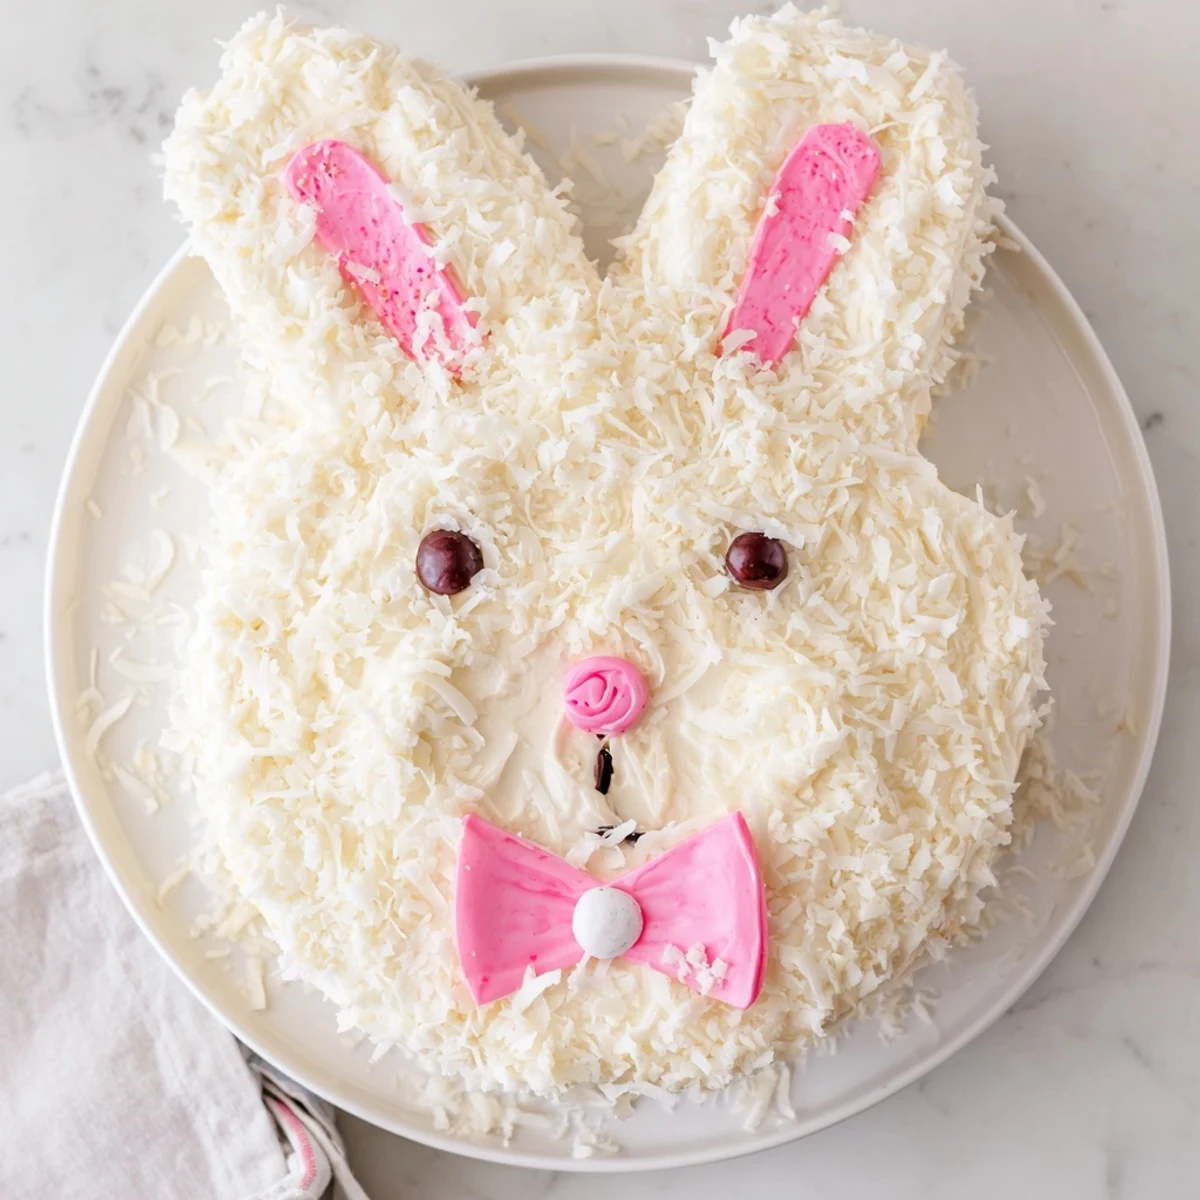
 This charming bunny-shaped dessert brings whimsy to any Easter or spring celebration. The moist vanilla base provides the perfect canvas for creative decoration with fluffy buttercream, shredded coconut for furry texture, and colorful candy details. One cake becomes the face while a second transforms into floppy ears and a bow tie, creating an impressive centerpiece that looks professional but requires only basic baking skills. The coconut covering adds both visual appeal and subtle sweetness that complements the rich vanilla frosting.
My daughter turned six right before Easter one year, and she marched into the kitchen with a very specific request. Not a princess cake, not a unicorn, but a bunny. I had never attempted shaped cake decorating before, and honestly my hands were shaking a little as I cut into that second round cake pan. But the moment she saw those coconut covered ears and jellybean eyes, she gasped like I had performed actual magic.
Last spring, I made three of these cakes in one week for different family gatherings. By the third bunny, my kitchen looked like a coconut bomb had exploded, and I found shredded coconut in my apron pockets days later. Everyone kept asking where I bought the cake, which is just about the best compliment a home baker can receive.
Ingredients
- All-purpose flour: The backbone of this tender cake, measure carefully by spooning into your measuring cup and leveling off
- Baking powder and baking soda: Both work together for that perfect rise, make sure they are fresh
- Unsalted butter: Softened properly gives you the best aeration in both cake and frosting
- Granulated sugar: Creates the structure and tender crumb we want in a celebration cake
- Large eggs: Room temperature eggs incorporate better and prevent curdling
- Whole milk: Adds moisture and richness, I would not substitute with lower fat options
- Vanilla extract: Use the good stuff here since vanilla is the star flavor
- Powdered sugar: Sift it first to prevent lumps in your silky buttercream
- Sweetened shredded coconut: The secret to that fluffy bunny fur effect everyone loves
- Pink food coloring: A tiny drop goes a long way for those sweet inner ear details
- Jelly beans or mini candies: Perfect for creating that cute bunny face personality
- Pink and white fondant or marshmallows: Either works beautifully for those perky ears
Instructions
- Prepare the oven and pans:
- Preheat your oven to 350°F and generously grease two 8-inch round pans with butter, then dust with flour for easy release
- Whisk the dry ingredients:
- In a medium bowl, combine flour, baking powder, baking soda, and salt, whisking until well blended
- Cream the butter and sugar:
- Beat butter and sugar in a large bowl until pale and fluffy, about 3 minutes, then add eggs one at a time
- Combine wet and dry:
- Add vanilla, then alternate adding flour mixture and milk, starting and ending with flour, mixing just until combined
- Bake the layers:
- Divide batter evenly between pans and bake for 22 to 25 minutes until a toothpick comes out clean
- Cool completely:
- Let cakes rest in pans for 10 minutes, then turn onto wire racks to cool entirely before shaping
- Make the frosting:
- Beat butter until smooth, then gradually add powdered sugar, vanilla, salt, and milk until spreadable
- Shape the bunny parts:
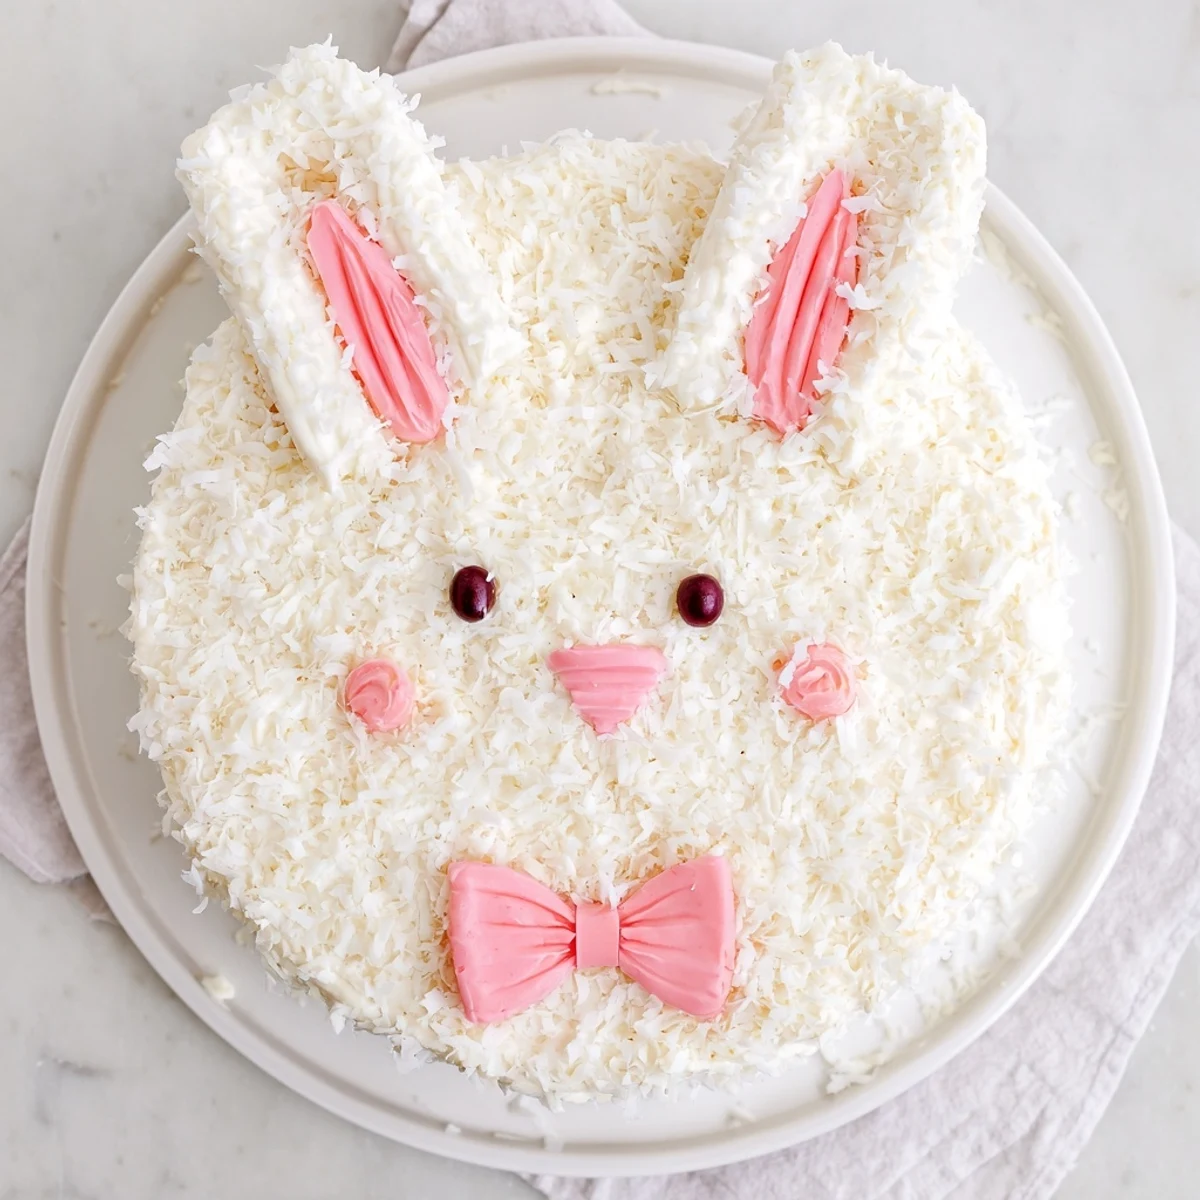
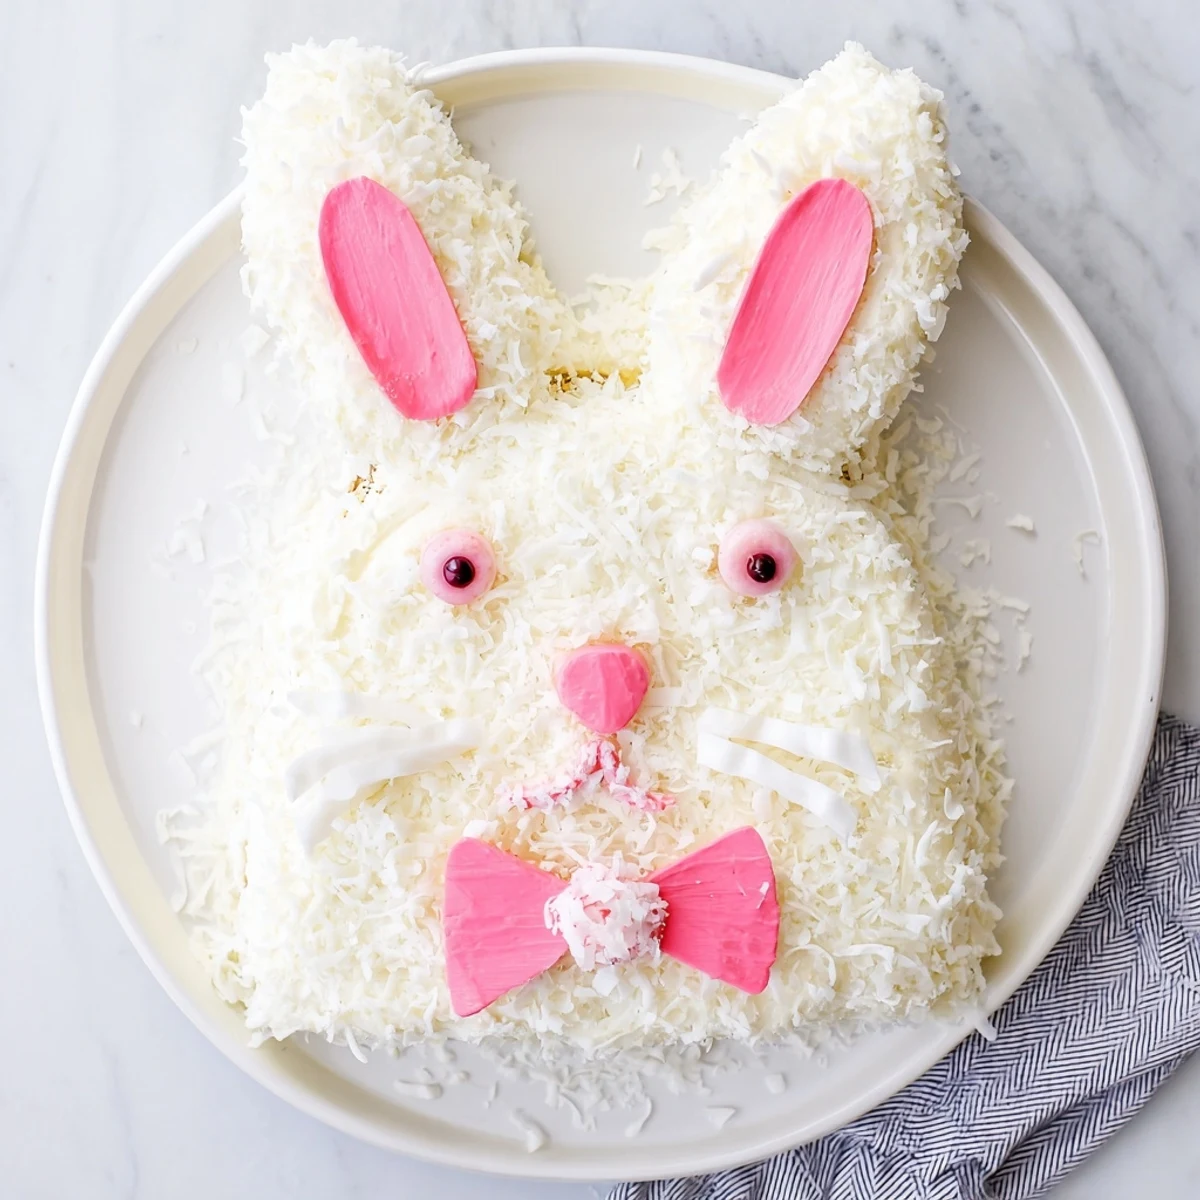
- Keep one cake whole for the face, cut the second into two oval ears and shape the center into a bow tie
- Assemble on your tray:
- Arrange face, ears, and bow tie on a large serving platter, leaving some space between pieces
- Add a crumb coat:
- Spread a thin layer of frosting over everything and chill for 20 minutes to lock in those crumbs
- Apply the final frosting:
- Cover completely with remaining buttercream, then press shredded coconut all over for fluffy fur
- Create the pink details:
- Tint a handful of coconut with pink coloring and gently press onto the inner ear sections
- Add the face:
- Use candies for the nose and eyes, arrange fondant or marshmallows for ears, and add whiskers if desired
 Pin This
 My mom said she had never seen me more nervous about a cake than when I placed that first bunny on the Easter table. But when my niece pointed and shouted bunny cake, then immediately asked if she could have the ear piece, I knew all the coconut cleanup was worth it.
Making It Ahead
You can bake the cake layers a day ahead and wrap them tightly in plastic wrap at room temperature. The buttercream also keeps beautifully in the refrigerator for two days, just bring it to room temperature and give it a quick whip before frosting.
Easy Flavor Variations
Chocolate lovers can swap in your favorite chocolate cake recipe, or fold lemon zest into the batter for a bright spring twist. The coconut covering pairs surprisingly well with both variations, so feel free to experiment.
Serving And Storage
This bunny cake tastes best at room temperature, so let it sit out for 30 minutes before serving if you have refrigerated it. The coconut stays fresh and fluffy for days, making this a great make-ahead dessert for busy holiday weekends.
- Use a large spatula when serving to keep those ears intact
- Press coconut onto the cut sides of the cake pieces too for a seamless look
- Keep the face decorations simple, less is definitely more with cute animal cakes
 Pin This
 There is something so joyful about cutting into a dessert that makes everyone smile before they even take a bite. This bunny cake has become our family is most requested spring treat, and I hope it brings just as much delight to your table.
Recipe FAQs
- → How far in advance can I make the bunny cake?
-
The cake layers can be baked and frozen up to a month ahead. Thaw overnight, then assemble and decorate the day before your event. The fully decorated bunny cake stays fresh at room temperature for 2 days or refrigerated for up to 4 days.
- → What's the best way to cut the cake into bunny shapes?
-
Leave one 8-inch round whole for the face. Cut the second round in half to create two oval ears, then trim the remaining center into a bow tie. Use a serrated knife for clean edges, and arrange all pieces on your serving platter before frosting.
- → Can I make this bunny cake without coconut?
-
Absolutely. Skip the coconut coating and simply pipe the buttercream in fur-like swirls using a star tip. You can also sprinkle with colored sanding sugar, crushed vanilla wafers, or white chocolate shavings for alternative texture and visual appeal.
- → What type of candy works best for the bunny face?
-
Pink jellybeans or conversation hearts make cute noses. Use chocolate chips, mini M&Ms, or edible googly eyes for the eyes. Licorice laces create natural whiskers. Pink and white fondant or large marshmallows sliced lengthwise work beautifully for ears.
- → Can I use chocolate cake instead of vanilla?
-
Chocolate cake works wonderfully and creates striking contrast with white frosting and coconut. Simply substitute your favorite chocolate cake recipe or use a devil's food cake mix. The decorating technique remains exactly the same.
- → How do I transport a bunny cake without damaging it?
-
Decorate directly on a sturdy cake board or large serving platter with raised edges. Use non-slip shelf liner under the board to prevent sliding. Carry with two hands from underneath, keeping it flat. For longer distances, place in a large cardboard box with tissue paper support.