 Pin This
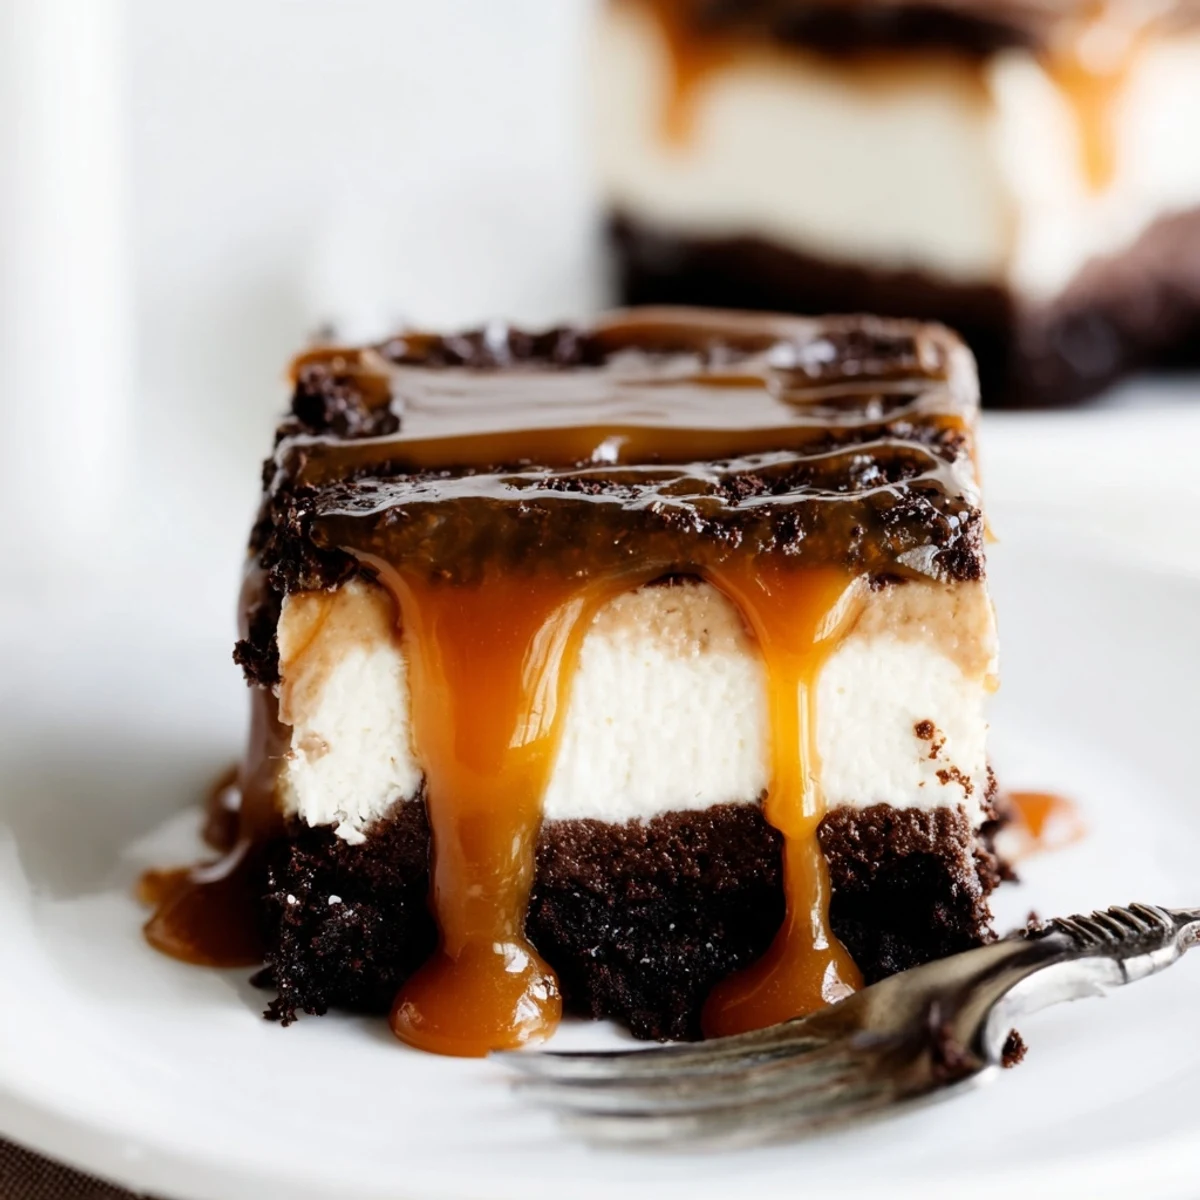
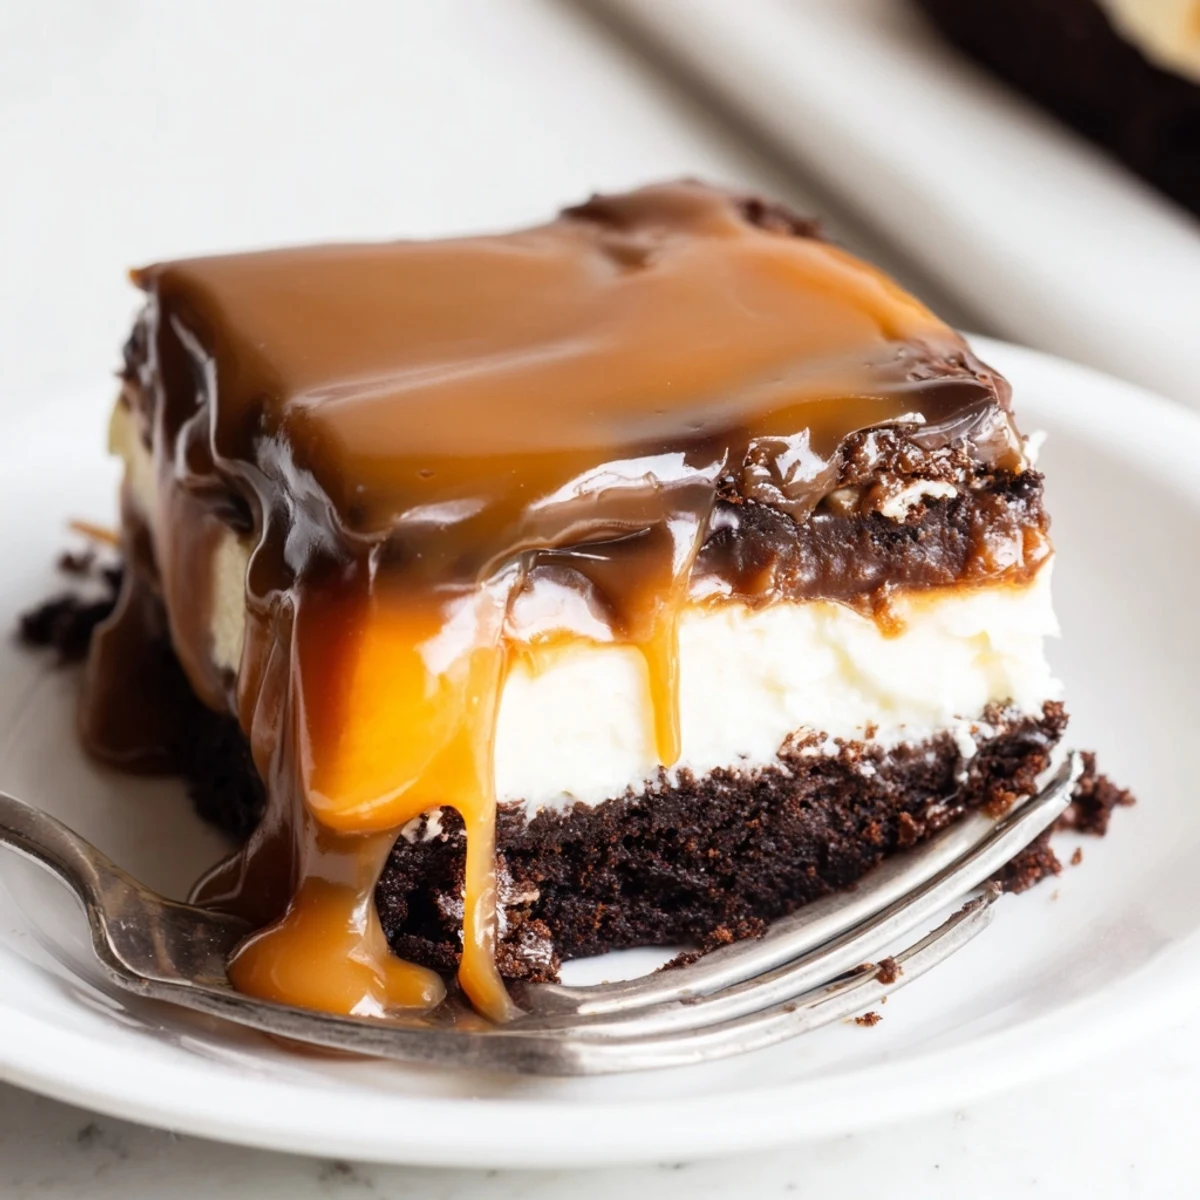
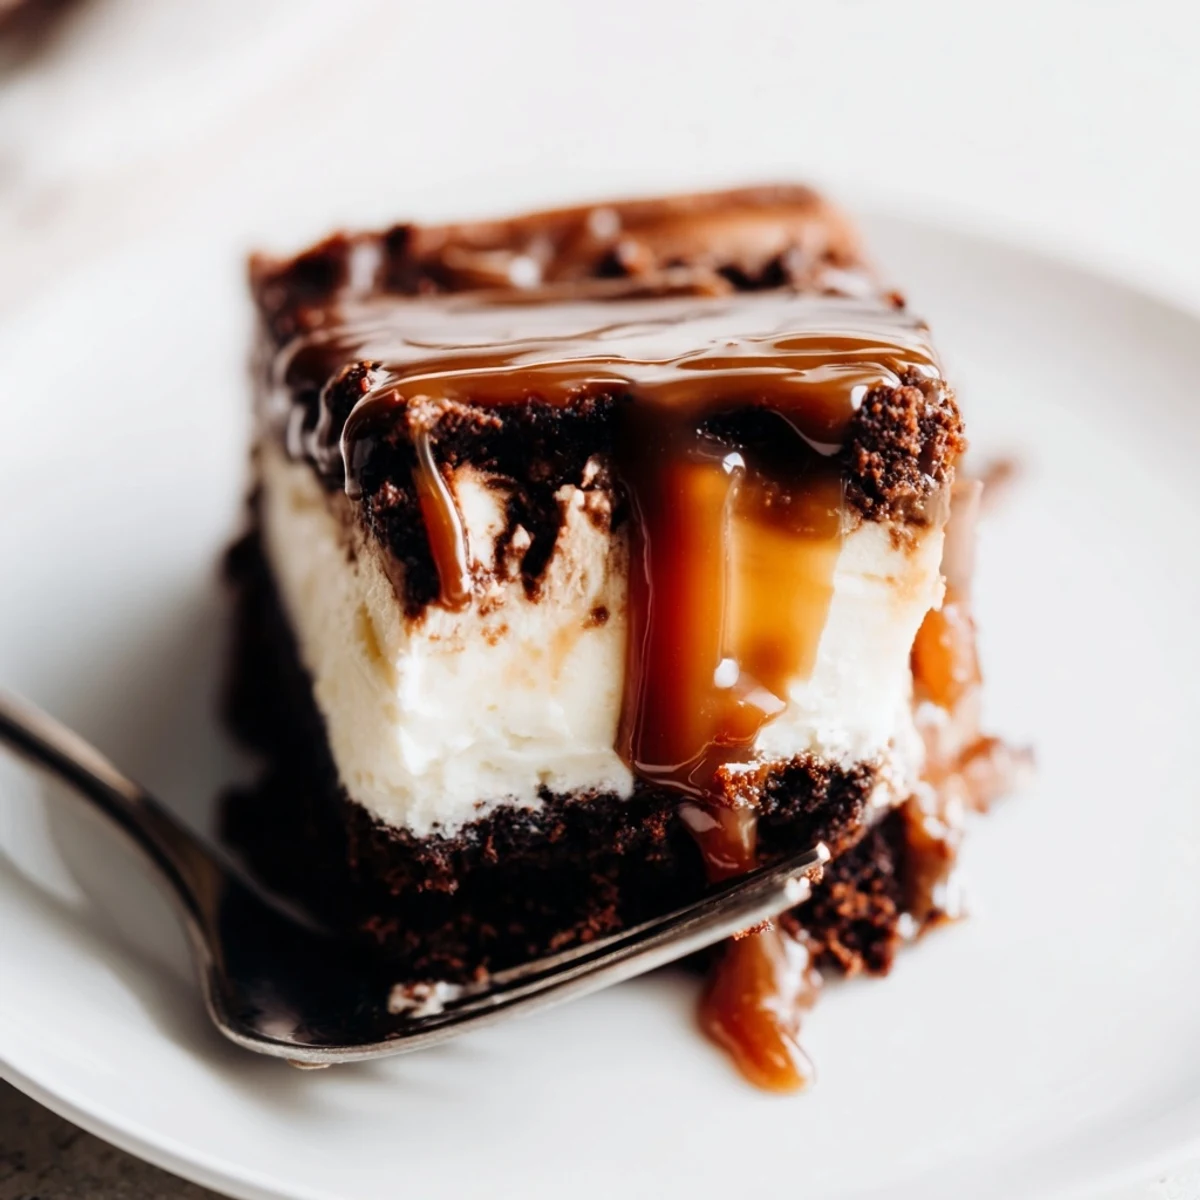
 This indulgent dessert brings together three beloved treats in one spectacular creation. A dense, fudgy brownie base forms the foundation, topped with a smooth and tangy cheesecake layer that bakes to perfection. The crowning glory is a glossy caramel topping that adds sweetness and visual appeal. While the total time includes chilling for proper setting, the actual hands-on preparation is quite straightforward. The result is twelve impressive bars that balance chocolate intensity with creamy richness and buttery caramel notes.
The first time I made this brownie cheesecake hybrid, my kitchen smelled like chocolate heaven for hours. My roommate kept wandering in every ten minutes asking if it was done yet. Now whenever I bake it, the anticipation builds just the same way—that rich cocoa scent hitting the air is pure magic.
I brought these to a potluck last winter and watched them disappear in record time. Someone actually asked if I had a catering business because the presentation looked so professional. The best part was seeing people's eyes light up at that first bite of caramel hitting the cheesecake layer.
Ingredients
- 115 g unsalted butter: Melt this slowly and let it cool slightly before mixing prevents curdling the eggs
- 150 g granulated sugar: Room temperature butter incorporates sugar more evenly for that perfect glossy finish
- 2 large eggs: Crack these into a separate bowl first to catch any shell fragments
- 1 tsp vanilla extract: Pure vanilla makes a noticeable difference in the final flavor
- 60 g all-purpose flour: Measure by spooning into the cup and leveling off for accuracy
- 30 g unsweetened cocoa powder: Sift this directly into the bowl to avoid lumps
- ¼ tsp salt: This tiny amount balances the sweetness and enhances chocolate flavor
- 450 g cream cheese: Let this sit out for a full hour to reach room temperature
- 100 g granulated sugar: Beat this thoroughly with cream cheese to avoid grainy texture
- 2 large eggs: Add one at a time and beat only until incorporated
- 1 tsp vanilla extract: Adds depth to the tangy cheesecake layer
- 60 ml sour cream: Room temperature sour cream blends in seamlessly
- 180 g soft caramels: Unwrap these while the cake bakes to save time later
- 2 tbsp heavy cream: Warm this slightly with the caramels for easier melting
Instructions
- Prep your pan:
- Parchment overhang acts as handles to lift the whole cake out cleanly
- Mix the brownie base:
- Whisk until glossy and smooth but do not overmix or the brownie becomes cakey
- Spread brownie batter:
- Use an offset spatula to create an even layer in the pan corners
- Beat the cheesecake layer:
- Cream cheese should feel completely smooth before adding any eggs
- Layer the cheesecake:
- Pour slowly in the center and let it spread naturally to avoid disturbing the brownie
- Bake until just set:
- The center should still have a slight wobble but not be liquid
- Cool completely:
- Rushing this step causes the cheesecake to crack
- Chill thoroughly:
- Two hours minimum prevents the caramel from melting into the cheesecake
- Melt the caramel:
- Stir constantly over low heat to prevent scorching
- Add the topping:
- Pour gently and tilt the pan to spread without tearing the cheesecake surface
- Chill again:
- Thirty minutes sets the caramel perfectly for clean slices
 Pin This
 This has become my go-to birthday dessert because everyone asks for it now. Last month my sister actually requested it instead of a cake which felt like a huge compliment. Something about that caramel dripping down the sides makes it feel like a special occasion.
Getting the Layers Right
The key is pouring the cheesecake batter directly into the center of the brownie layer. I used to spread it around with a spatula but that would swirl the two together. Letting gravity do the work keeps each layer distinct and beautiful.
The Caramel Game Changer
Mixing a splash of cream into the melted caramels transforms the texture completely. Without it the caramel sets too hard and becomes difficult to slice through cleanly. The cream keeps it soft and velvety even after chilling.
Slicing Success
Run your knife under hot water and wipe it clean between every single slice. Cold knife cuts through caramel cleanly while a warm knife drags and makes messy edges. I keep a mug of hot water beside the cutting board now.
- Square pan corners need extra attention when lining with parchment
- Leftovers keep surprisingly well in the freezer for up to a month
- Let slices sit at room temperature for 15 minutes before serving
 Pin This
 There is something deeply satisfying about slicing into this cake and seeing all three layers revealed. Every bite feels like finding a new surprise.
Recipe FAQs
- → How long does this need to chill before serving?
-
The dessert requires at least 2.5 hours of chilling time—2 hours after baking for the cheesecake layer to set, then an additional 30 minutes after adding the caramel topping. For easiest slicing, chill overnight or for at least 4 hours total.
- → Can I make this ahead of time?
-
Absolutely. This dessert actually improves with a day in the refrigerator as flavors meld. Store covered in the refrigerator for up to 5 days. The caramel topping stays smooth and glossy when chilled properly.
- → What's the best way to get clean cuts?
-
Use a sharp knife warmed under hot water and wiped clean between cuts. For the neatest squares, you can freeze the entire pan for 30 minutes before slicing, then let pieces come to room temperature before serving.
- → Can I use homemade caramel instead?
-
Yes, homemade salted caramel sauce works beautifully. Use about 180g (¾ cup) of your preferred caramel recipe. The homemade version may be slightly softer at room temperature but tastes equally delicious.
- → Why did my cheesecake layer crack?
-
Cracking usually occurs from overbaking or overmixing the batter. Pull it from the oven when the center is just set with a slight wobble. Overbeating once eggs are added incorporates too much air, leading to cracks during cooling.
- → Can I add mix-ins to the brownie layer?
-
Certainly. Chocolate chips, chopped pecans, or walnuts fold in nicely. Add about ½ cup of your choice after combining the brownie batter, then spread into the pan. This adds texture without disturbing the layer structure.