 Pin This
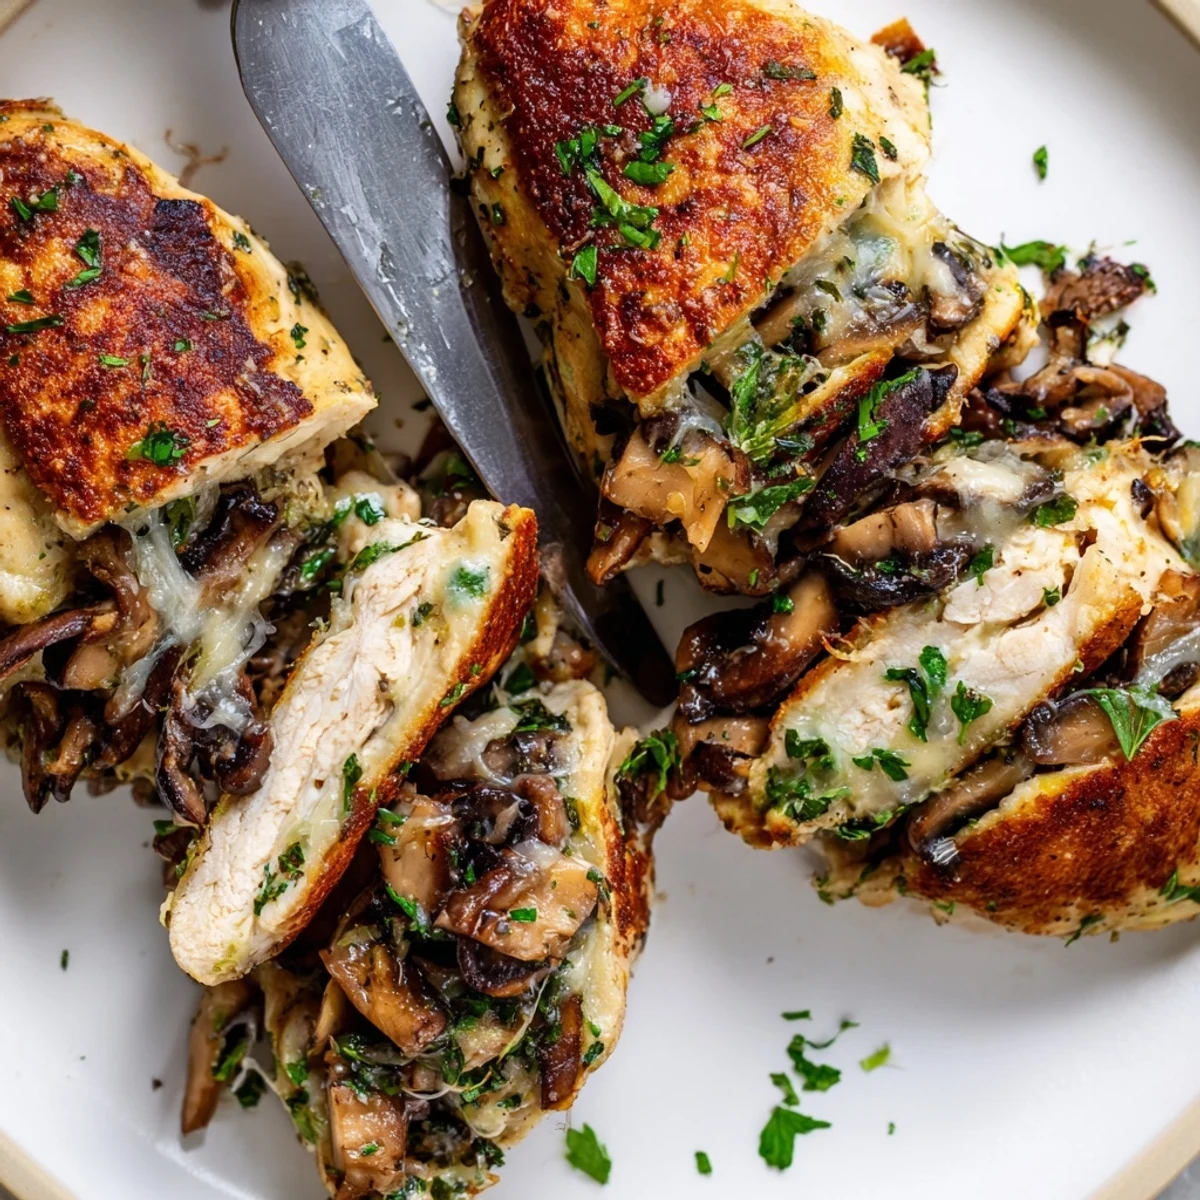
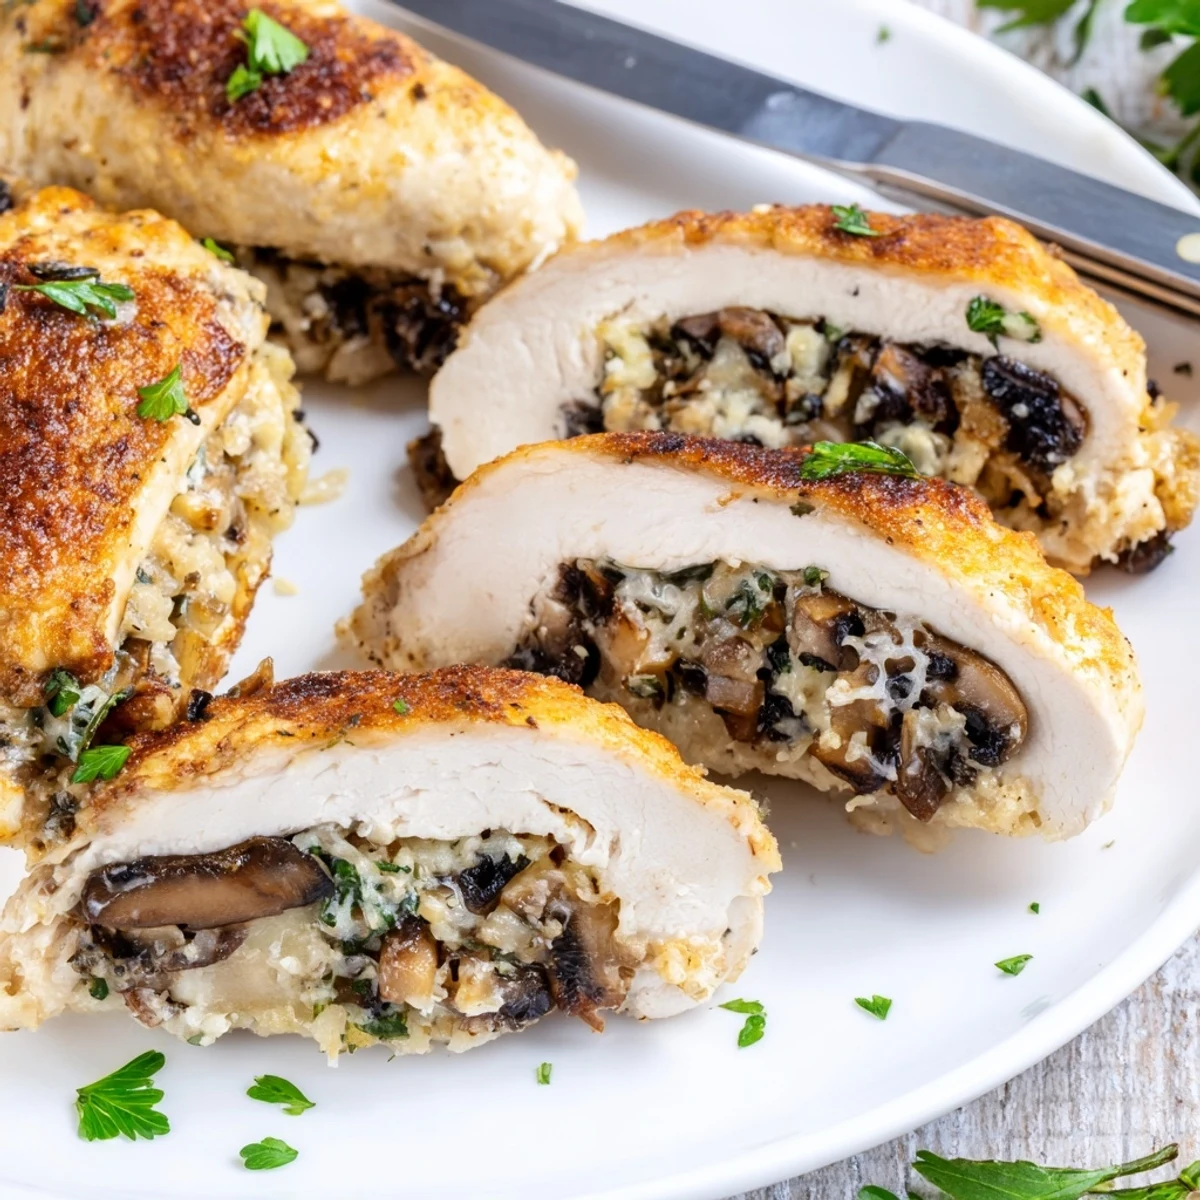
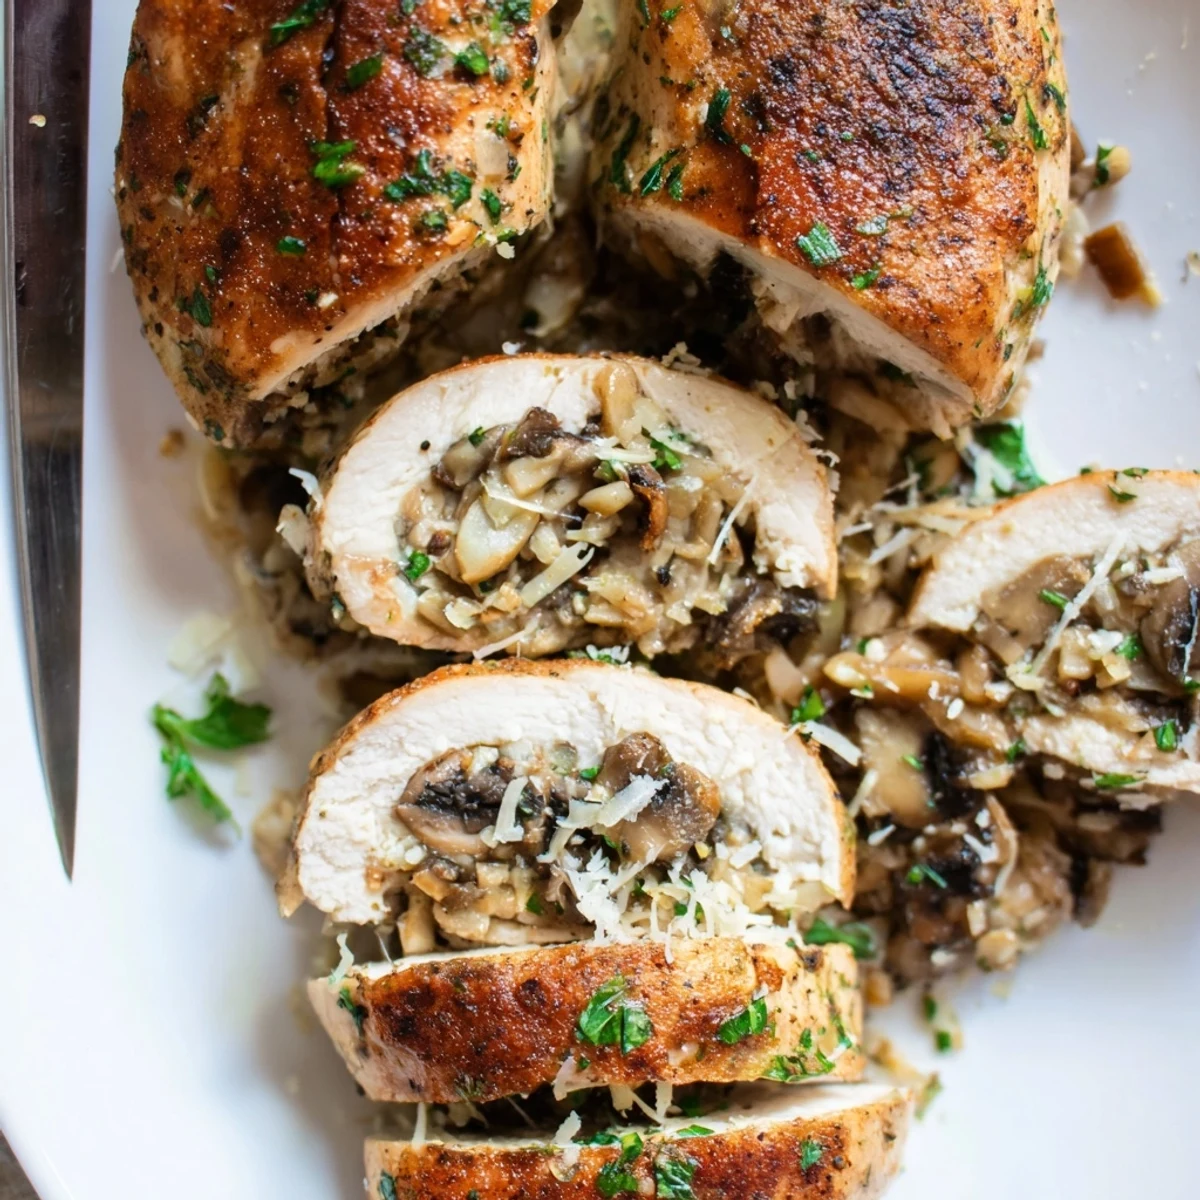
 Transform chicken breasts into an impressive main dish by creating a pocket and filling with savory mushrooms, garlic, shallots, and Italian herbs. Sear in a hot skillet to develop a golden crust, then finish in the oven with chicken broth for added moisture. The result is tender, juicy chicken with a rich, cheesy mushroom center that delivers restaurant-quality presentation and taste.
My sister called me midweek, sounding exhausted. She wanted something impressive but doable for a dinner party that Friday. I talked her through this stuffed chicken while standing in my own kitchen, phone tucked between shoulder and ear, probably making it for the third time that month.
That Friday she texted me a photo of empty plates and three happy guests. She said the sear step made all the difference, giving it that restaurant-quality crust she never thought she could achieve at home. Now she makes it for Sunday dinner and her kids actually request the mushrooms.
Ingredients
- 4 large boneless skinless chicken breasts: Look for breasts that are relatively even in thickness for consistent cooking
- 1 tablespoon olive oil: Used for initial seasoning, helps the spices cling to the meat
- 1/2 teaspoon salt and 1/2 teaspoon black pepper: Season both the outside and inside of each pocket thoroughly
- 2 tablespoons unsalted butter: This forms the foundation of your filling, giving the mushrooms richness
- 2 cups cremini or white mushrooms finely chopped: Finely chopping is crucial so they fit neatly inside the chicken pockets
- 2 cloves garlic minced: Adds aromatic depth without overpowering the delicate filling
- 1 small shallot finely diced: Shallots are milder than onions and blend beautifully into the mixture
- 1/2 teaspoon dried thyme and 1/2 teaspoon dried oregano: These earthy herbs complement mushrooms naturally
- 1/4 cup grated Parmesan cheese: Adds a salty, nutty component that intensifies when baked
- 1/4 cup shredded mozzarella cheese: Creates those gorgeous cheese pulls when you slice into the chicken
- 2 tablespoons chopped fresh parsley: Brings fresh color and a bright finish to cut through the richness
- 1 tablespoon olive oil for searing: High-heat friendly oil is essential for getting that golden crust
- 1/2 cup low-sodium chicken broth: Creates steam in the oven and becomes the base of an instant pan sauce
Instructions
- Get your oven ready:
- Preheat to 400°F so everything can go smoothly once your chicken is stuffed and seared
- Make the mushroom filling:
- Melt butter in a skillet over medium heat, add shallot and garlic for 1 minute until fragrant, then toss in mushrooms with thyme, oregano, salt, and pepper. Cook about 7 minutes until golden and most moisture has evaporated, then cool slightly before stirring in both cheeses and parsley
- Create the pockets:
- Pat chicken completely dry with paper towels, then use a sharp knife to cut a deep horizontal pocket into the thickest side of each breast without cutting through. Season inside and out generously with salt and pepper
- Stuff the chicken:
- Spoon the cooled mushroom mixture into each pocket, pressing gently to fill without tearing, and secure with toothpicks if the pockets feel loose
- Sear for golden crust:
- Heat olive oil in a large oven-safe skillet over medium-high heat and cook stuffed breasts for 2 to 3 minutes per side until deeply golden
- Bake to perfection:
- Pour chicken broth into the skillet and transfer to the preheated oven for 15 to 20 minutes until internal temperature reaches 165°F and juices run clear
- Rest before serving:
- Remove toothpicks carefully, let chicken rest for 5 minutes so juices redistribute, then slice crosswise to show off that beautiful filling
 Pin This
 Ive made this for picky eaters who swore they hated mushrooms, then watched them go back for seconds. Something about the combination of seared chicken and melted cheese makes people forget their preconceived notions.
Making Ahead
You can stuff the chicken up to a day ahead and keep it refrigerated. The filling actually develops more flavor overnight. Just let it sit at room temperature for 20 minutes before searing.
Choosing the Right Chicken
Ive learned that thicker breasts work better than thin ones. They have more structural integrity for holding the filling. If your chicken is very thick, pound it slightly to even it out before cutting the pocket.
Serving Suggestions
Roasted asparagus or green beans complement this perfectly. The pan juices are incredible spooned over everything on the plate, including whatever vegetables you choose.
- A light arugula salad with lemon vinaigrette cuts through the richness
- Mashed cauliflower keeps it low carb but feels indulgent
- Crispy roasted potatoes are always welcome even if they add back some carbs
 Pin This
 This recipe has saved more weeknight dinners than I can count. It transforms ordinary chicken into something worth lingering over.
Recipe FAQs
- → How do I create the pocket in the chicken breast?
-
Use a sharp knife to cut horizontally into the thickest side of each breast, creating a deep pocket while leaving the sides intact. Be careful not to cut all the way through the meat.
- → Can I prepare this dish ahead of time?
-
Yes, you can stuff the chicken breasts up to 24 hours in advance. Wrap tightly and refrigerate until ready to sear and bake.
- → What internal temperature should the chicken reach?
-
The stuffed chicken is safe to eat when the internal temperature reaches 165°F (74°C). Use a meat thermometer inserted into the thickest part to check.
- → Can I use different cheeses in the filling?
-
Absolutely. Swiss, Gruyère, or provolone work beautifully. The Parmesan adds umami while a melting cheese like mozzarella provides creaminess.
- → Why is chicken broth added before baking?
-
The broth creates steam in the oven, keeping the chicken juicy while preventing the filling from drying out. It also creates a light sauce in the pan.
- → What sides pair well with this dish?
-
Roasted vegetables, mashed cauliflower, rice pilaf, or a crisp green salad complement the rich flavors. A glass of Chardonnay enhances the experience.