 Pin This
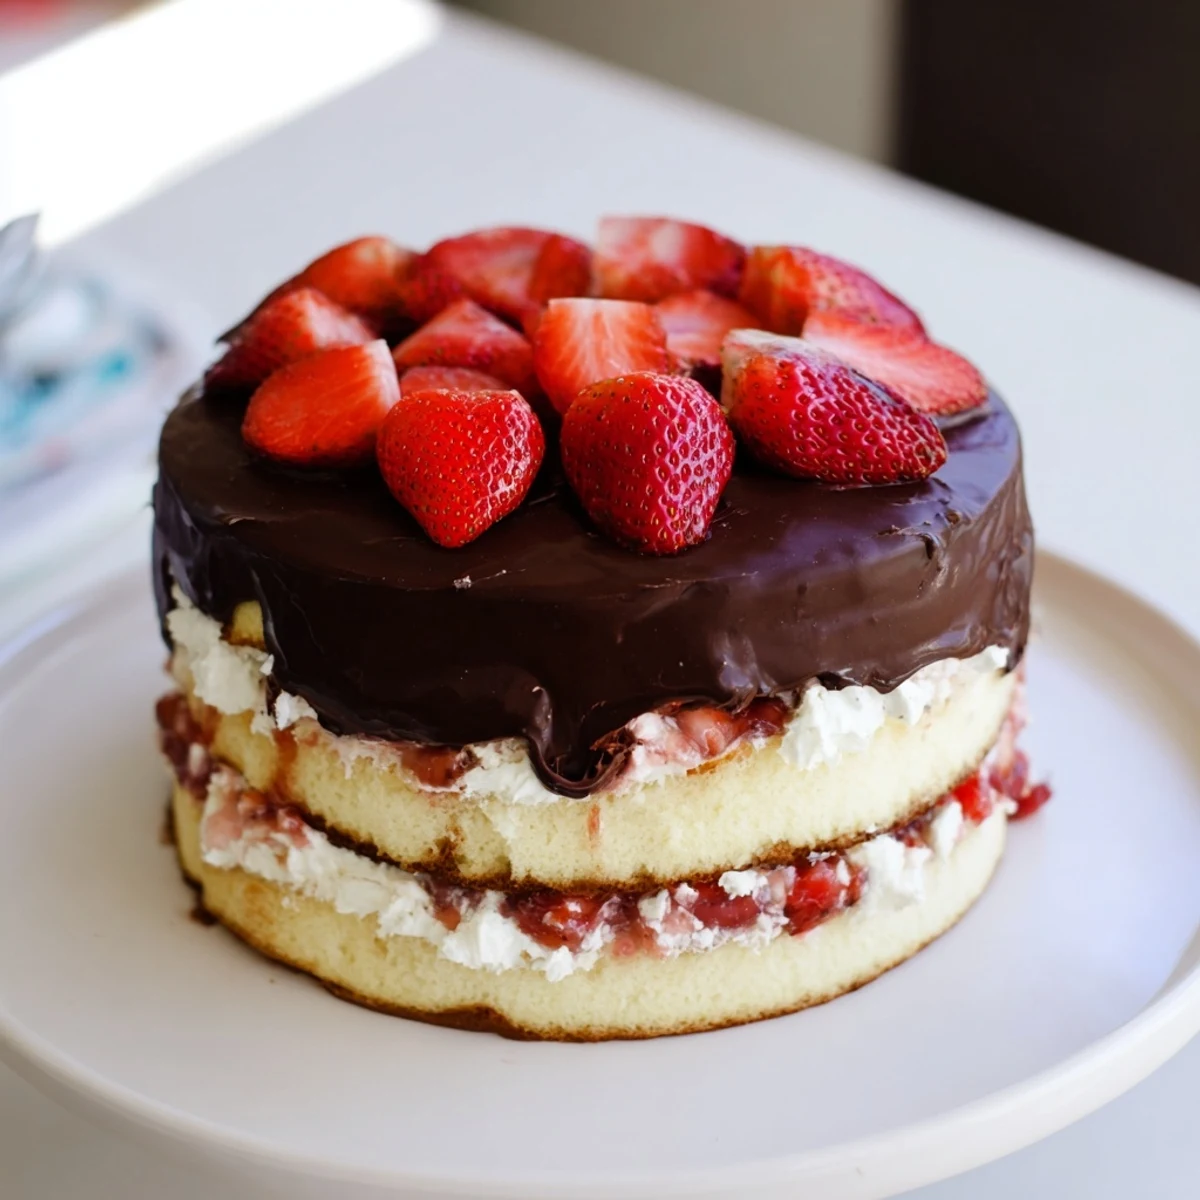
 This elegant dessert combines three essential elements: a light and airy vanilla sponge base, a tangy sweet strawberry jam filling, and billows of vanilla-scented whipped cream. The entire creation gets draped in melted dark chocolate mixed with coconut oil, which creates that signature crackling shell effect when sliced. The contrast between the creamy interior and crisp chocolate exterior makes each bite unforgettable.
The first time I attempted this cake, I stood in my kitchen watching chocolate cascade down the sides like a glossy waterfall, convinced I had ruined everything. Instead, that chocolate shell crackled perfectly under my knife, revealing those ruby-red strawberry layers beneath. My sister still talks about that dinner party whenever someone mentions dessert.
I made this for my mothers birthday last spring, carefully arranging halved strawberries on top like little jewels. When she sliced into it and that chocolate made that satisfying crack sound, the whole table went quiet. Thats the moment a recipe becomes a tradition instead of just dessert.
Ingredients
- 2 cups all-purpose flour: The foundation of our tender vanilla sponge, dont skip the sifting for extra lightness
- 1 ½ tsp baking powder: Gives your cake those delicate airy layers we want
- ½ tsp salt: Balances sweetness and enhances vanilla flavor
- 4 large eggs: Must be room temperature or they wont whip into that fluffy texture we need
- 1 cup granulated sugar: Creates structure while sweetening each tender bite
- ½ cup whole milk: Room temperature milk incorporates smoothly without seizing the batter
- ½ cup unsalted butter: Melt and cool it first, then fold it in gently for richness
- 2 tsp pure vanilla extract: The aromatic backbone that makes everything taste homemade
- 2 cups fresh strawberries: Dice them small so they cook down into that jammy consistency
- 2 tbsp granulated sugar: Just enough to draw out strawberry juices without masking their natural sweetness
- 1 tbsp lemon juice: Brightens the filling and helps that gorgeous red color pop
- 2 tsp cornstarch: The secret to getting strawberry filling thick enough to layer neatly
- 1 ¼ cups heavy cream: Ice cold cream whips up stiffer and holds its beautiful shape longer
- 3 tbsp powdered sugar: Sweetens the cream without making it too heavy or dense
- 2 cups dark chocolate: 60 to 70% cocoa gives you that sophisticated bittersweet balance
- 2 tbsp coconut oil: Makes the chocolate shell glossy and gives it that perfect snap
Instructions
- Prep your pans and oven:
- Preheat oven to 350°F and grease two 8-inch round cake pans, lining bottoms with parchment paper so nothing sticks later.
- Mix the dry ingredients:
- Whisk together flour, baking powder, and salt in a bowl, then set aside while you work on the wet mixture.
- Whip eggs and sugar:
- Beat eggs and sugar on high speed for about 5 minutes until the mixture turns pale and doubles in volume, creating that fluffy sponge texture.
- Fold everything together:
- Gently fold in the flour mixture, then add milk, melted butter, and vanilla, mixing just until combined.
- Bake the layers:
- Divide batter between pans and bake for 25 to 30 minutes until a toothpick comes out clean.
- Cool completely:
- Let cakes rest in pans 10 minutes, then turn onto wire racks to cool entirely before filling.
- Make strawberry filling:
- Combine strawberries, sugar, lemon juice, and cornstarch in a saucepan, cooking over medium heat until thickened and jammy.
- Cool the filling:
- Let the strawberry mixture cool completely so it doesnt melt your whipped cream later.
- Whip the cream:
- Beat cold heavy cream with powdered sugar and vanilla until stiff peaks form, then keep chilled.
- Assemble the cake:
- Place one cake layer on a plate, spread with strawberry filling, then whipped cream, top with second layer, and cover everything with remaining cream.
- Freeze until firm:
- Chill the assembled cake in the freezer for 1 hour until very firm so the chocolate shell sets properly.
- Make the chocolate shell:
- Melt chocolate and coconut oil together over simmering water or in the microwave, stirring until smooth.
- Cool the chocolate:
- Let the chocolate mixture cool to room temperature but still pourable.
- Pour over the cake:
- Remove cake from freezer and pour chocolate over the top, letting it drip down the sides and cover completely.
- Set and decorate:
- Chill 30 minutes until chocolate sets, then decorate with fresh strawberries and any finishing touches you like.
 Pin This
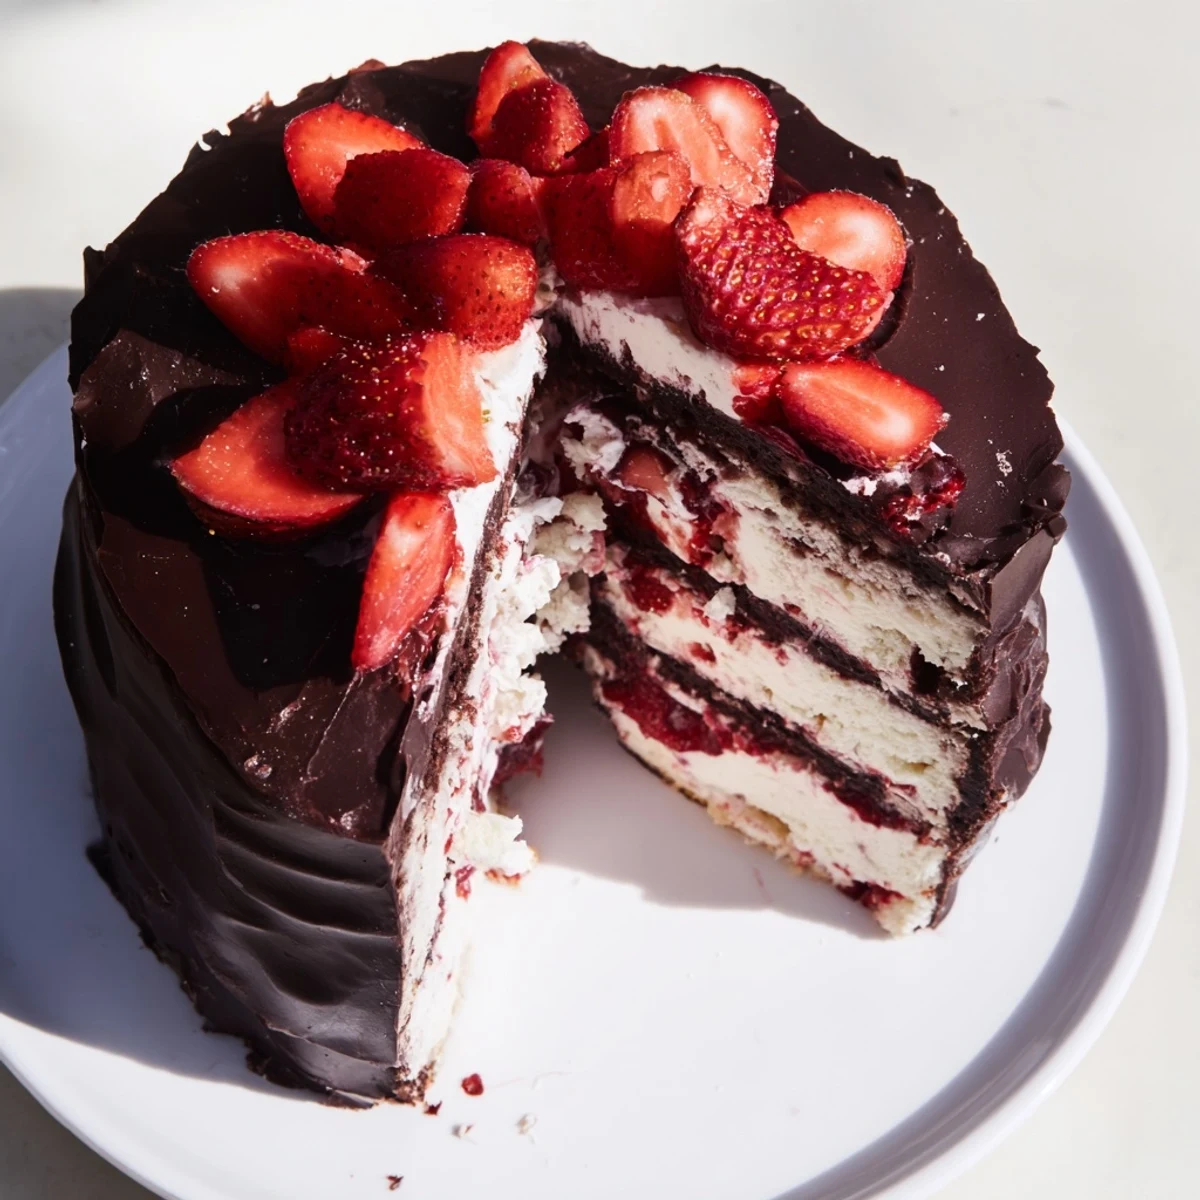
 This cake has become my go to for celebrations because it makes people gasp when I slice through that chocolate shell. Something about the combination of textures and flavors feels like a special occasion even on a random Tuesday.
Getting That Perfect Chocolate Shell
The chocolate coating needs to be at the right temperature, thick enough to coat but not so cool that it sets in streaks. Think warm honey consistency, and work quickly once you start pouring.
Making It Ahead
You can bake the sponge layers a day ahead and wrap them tightly at room temperature. The strawberry filling also keeps beautifully in the refrigerator for two days, so you can spread the work across multiple afternoons.
Serving And Storage Secrets
This cake actually tastes better after chilling overnight because all the flavors meld together and the texture firms up beautifully. Use a hot knife for clean slices, wiping the blade between cuts.
- Let the cake sit at room temperature 15 minutes before serving for the best texture
- Store leftovers covered in the refrigerator up to 3 days though it rarely lasts that long
- The chocolate shell may soften slightly at room temperature but still tastes incredible
 Pin This
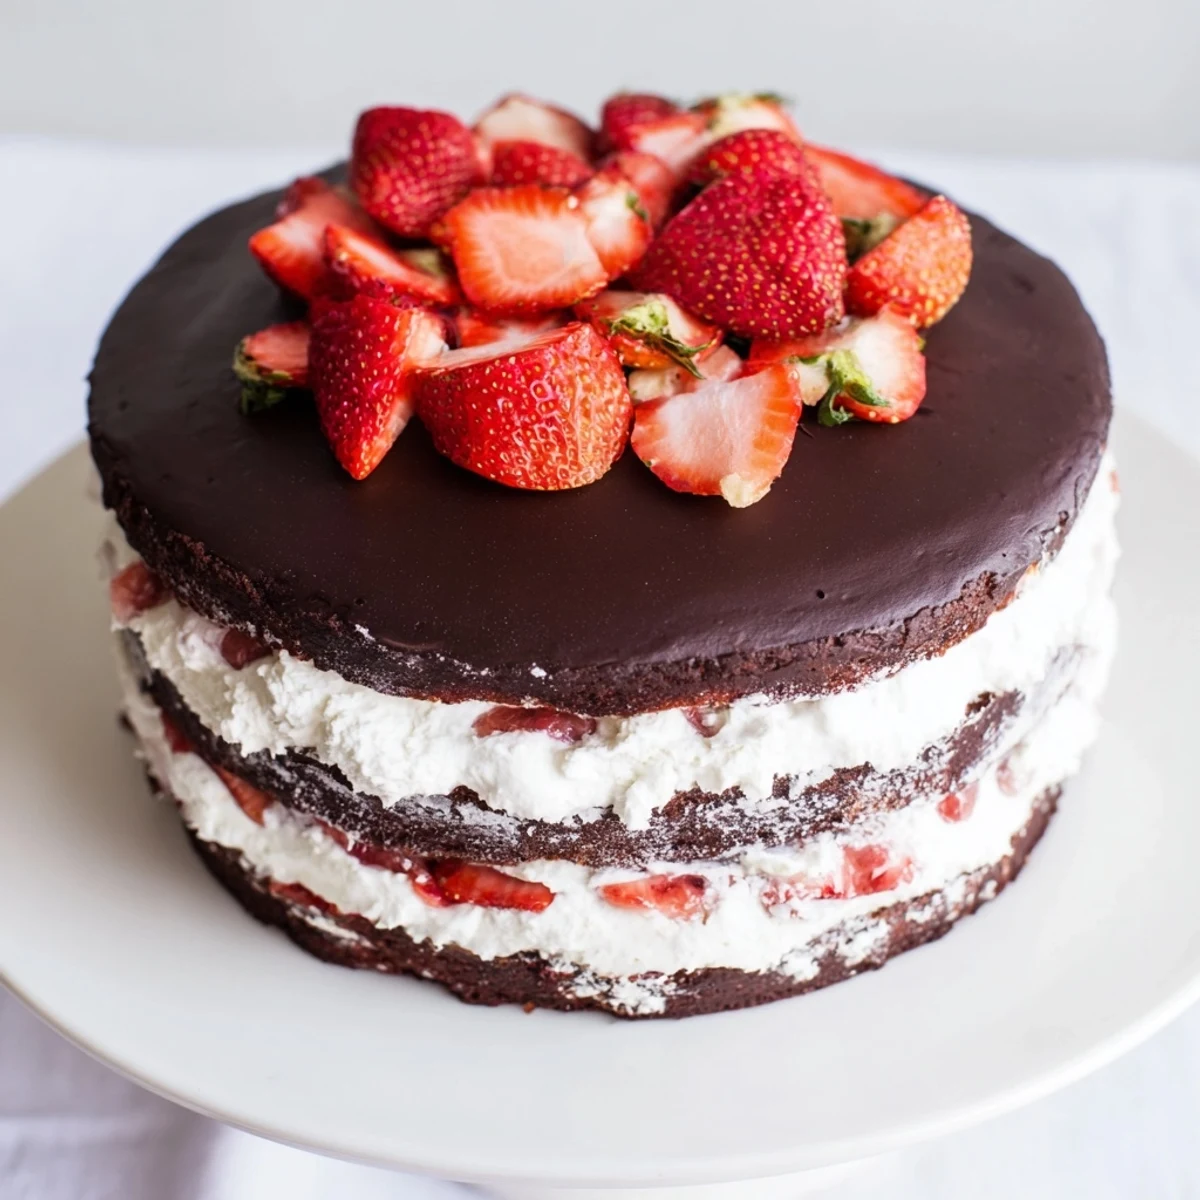
 There is something deeply satisfying about that first crack through the chocolate shell, like breaking into a treasure chest filled with summer memories. Every slice feels like a celebration worth sharing.
Recipe FAQs
- → How far in advance can I make this?
-
The cake can be assembled and chilled up to 24 hours before adding the chocolate shell. Once the chocolate coating is applied, it's best served within 6-8 hours for optimal texture and appearance.
- → Why must the cake be frozen before pouring chocolate?
-
Freezing ensures the whipped cream filling is firm enough to withstand the warm chocolate. If the cake isn't cold enough, the filling may melt or shift, and the chocolate won't set properly.
- → Can I use milk chocolate instead?
-
Milk chocolate will work but creates a softer shell due to lower cocoa content. For the best crackling effect, stick with dark chocolate 60-70% cocoa.
- → What if I don't have coconut oil?
-
Butter works as a substitute but may produce a slightly softer shell. Coconut oil creates the ideal glossy finish and snap when the chocolate sets.
- → How do I get clean slices?
-
Use a sharp knife dipped in hot water and wiped dry between cuts. Let the chilled cake sit at room temperature for 10 minutes before slicing for clean edges.
- → Can I make this in different pan sizes?
-
Yes, but adjust baking time accordingly. Three 6-inch pans will create a taller cake with shorter layers, while one 9x13 pan transforms this into a sheet cake variation.