 Pin This
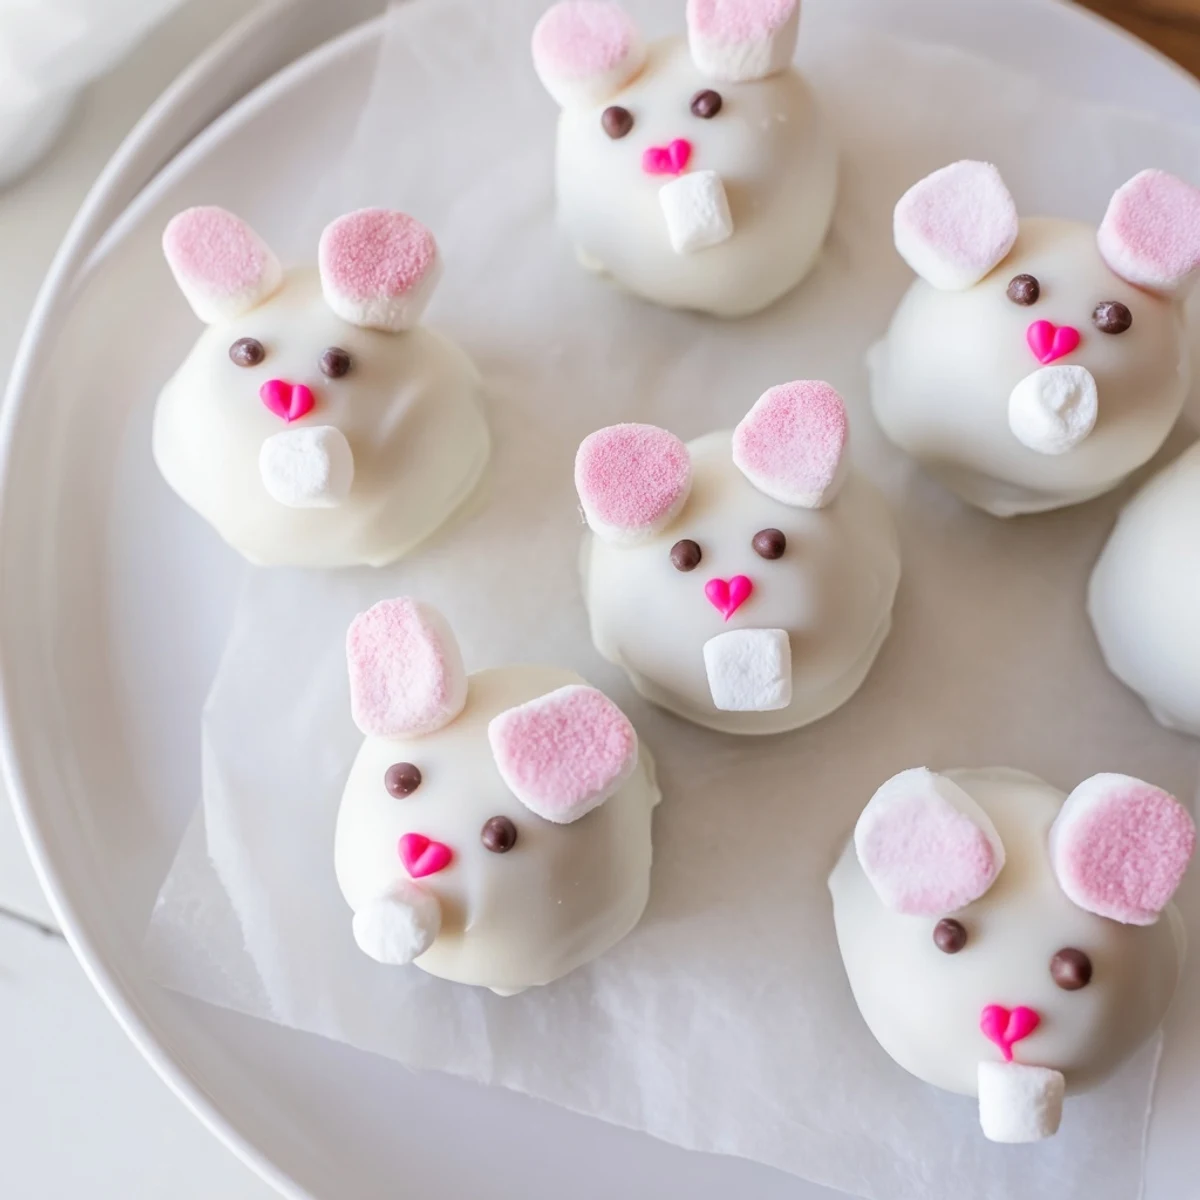
 These delightful bunny-shaped treats combine crushed Oreo cookies with creamy cream cheese, dipped in smooth white chocolate and decorated with marshmallow ears, pink sugar details, and chocolate chip eyes. Each adorable bite features a heart sprinkle nose and optional fluffy marshmallow tail, making them irresistible for both children and adults. The no-bake preparation comes together in under an hour, though the chilling time requires some planning ahead.
What makes these treats special is how the crunch of Oreos contrasts with the rich cream cheese filling, all enveloped in sweet white chocolate coating. The decorations transform simple truffles into charming spring treats that look impressive on dessert tables. While the assembly requires some patience for the detailed bunny faces, the result is worth every minute.
Store these in the refrigerator where they'll keep for up to a week, though they rarely last that long once family and friends spot them. Make a double batch if you're planning to share—or want to keep some hidden away for yourself.
Last spring, my niece insisted we make something "extra cute" for her class Easter party, and these bunny Oreo balls were born. I'll admit I was skeptical about dipping anything with mini marshmallows involved, but seeing kids' faces light up when they spotted the tiny bunny ears made all the sticky fingers worth it. We ended up with white chocolate smudged on our noses and pink sanding sugar everywhere, but that's half the fun anyway.
I learned the hard way that timing matters when decorating. My first batch ended up with bunny ears sliding off because I took too long admiring my work, and the chocolate started setting before the marshmallows could stick properly. Now I work in small batches, decorating six bunnies at a time while the white chocolate is still perfectly tacky.
Ingredients
- Oreo cookies: 36 cookies (about 300 g)—crushed into fine crumbs, these create the perfect fudgy base that holds everything together
- Cream cheese: 225 g (8 oz), softened—room temperature is nonnegotiable here, or youll end up with lumpy dough
- White chocolate or candy melts: 400 g (14 oz)—candy melts are actually easier for beginners since they set faster and dont seize up
- Mini marshmallows: 48 for ears plus 24 optional for tails—scissors give the cleanest diagonal cut
- Pink sanding sugar or edible gel: for that sweet blushing ear look
- Mini chocolate chips: 48 pieces—or use edible marker dots for a softer bunny expression
- Pink heart sprinkles or M&M minis: 24 pieces—these become the perfect tiny noses
Instructions
- Prep your workspace:
- Line a baking sheet with parchment paper and clear some counter space—these need room to chill and decorate
- Make the Oreo dough:
- Pulse Oreos in a food processor until youve got fine crumbs, then add softened cream cheese and blend until a thick, fudgy dough forms
- Shape your bunnies:
- Scoop tablespoon portions and roll them into smooth balls, placing each one on your prepared baking sheet
- Chill until firm:
- Freeze the balls for 20 to 30 minutes—they need to be rock solid before dipping or theyll fall apart in the chocolate
- Melt the coating:
- Heat white chocolate or candy melts in a microwave safe bowl, stirring every 30 seconds until completely smooth
- Dip and drip:
- Lower each chilled ball into the melted chocolate, use a fork to lift it out, and tap gently to let excess coating drip off
- Decorate immediately:
- Cut mini marshmallows diagonally, dip the cut side in pink sugar or gel, and press into the top of each ball for ears, then add eyes and nose before the chocolate sets
- Final chill:
- Refrigerate everything for at least 30 minutes so the coating hardens completely
 Pin This
 My neighbor texted me at 11 PM the night before Easter, panicked because she needed something for her daughters preschool party. I walked over with a container of these, and she hugged me like Id just handed her gold. Now we make them together every year, and our kitchen looks like a pastel explosion by midnight.
Getting That Perfect Dip
The difference between professional looking balls and a messy DIY situation comes down to temperature. If your chocolate is too hot, itll slide right off the cold Oreo centers. If its too cool, youll end up with a thick, clumpy coating. Aim for warm and fluid, almost like heavy cream, and work quickly once you start dipping.
Make-Ahead Magic
These are actually better when made a day ahead because the flavors have time to meld together. Store them in an airtight container between layers of parchment paper, and theyll stay fresh for up to a week. Just dont stack them directly on top of each other or the decorations will get smushed.
Beyond the Bunny
Once you master the basic technique, you can adapt these for any occasion. Use chocolate sandwich cookies for a brownie version, swap colored candy melts for pastel Easter eggs, or add crushed peppermint for a winter twist. The basic Oreo cream cheese combination works with pretty much any coating or decoration you can imagine.
- Try lemon Oreos with yellow coating for spring chicks
- Add a tiny peanut butter ball inside for a surprise center
- Use dark chocolate coating for a more sophisticated adult version
 Pin This
 Theres something genuinely satisfying about turning sandwich cookies and cream cheese into something that makes people gasp with delight. Happy baking, and may your bunny ears stay perfectly perched.
Recipe FAQs
- → How long do bunny Oreo balls need to chill?
-
The Oreo balls need to freeze for 20–30 minutes before dipping to ensure they're firm enough to handle. After decorating, they require another 30 minutes in the refrigerator to set completely. This chilling time is crucial—the balls will slide right off the fork if they're too soft when you dip them.
- → Can I make these ahead of time?
-
Absolutely! You can prepare the Oreo mixture and roll the balls up to 2 days in advance, storing them in the refrigerator or freezer. Dip and decorate them 1–2 days before your event. Once fully set, store in an airtight container in the refrigerator for up to a week. They also freeze well for up to a month before decorating.
- → What's the best way to melt white chocolate for dipping?
-
Melt white chocolate in a microwave-safe bowl in 30-second intervals, stirring thoroughly between each burst. White chocolate seizes easily, so avoid overheating—if it starts looking grainy, add a teaspoon of vegetable oil to smooth it out. Keep the chocolate warm while dipping by placing the bowl over a pan of barely simmering water.
- → Can I use regular chocolate instead of white?
-
Yes, milk or dark chocolate works perfectly for coating. However, the white chocolate provides the classic bunny canvas for decorations. If using darker chocolate, consider decorating with white chocolate drizzle or colored sprinkles instead. Semi-sweet chocolate pairs beautifully with the Oreo filling too.
- → My white chocolate coating is too thick. What should I do?
-
If the white chocolate is too thick for smooth dipping, stir in 1–2 teaspoons of coconut oil or vegetable shortening to thin it out. This creates a silky consistency that coats evenly without being so runny that it drips off completely. Avoid adding water or milk, which will cause the chocolate to seize.
- → What if I don't have a food processor?
-
Place Oreos in a large zip-top bag and crush them with a rolling pin or heavy skillet. You'll want fine crumbs for the smoothest texture, though slightly chunkier pieces add nice texture. Alternatively, use a blender and pulse in batches. The manual crushing method takes more effort but yields equally delicious results.